Thursday, November 23, 2006


Mermaids

Where did they originate from?
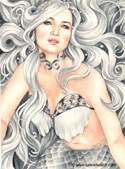
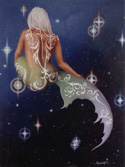
Some families in Scotland and Ireland still claim descent from mermaids. The Orkneys have slightly webbed hands because an ancestress of theirs comforted herself from an unhappy marriage by dallying with a selkie, a type of merman who is part seal. The MacCodrums were descended from a selkie woman whose sealskin had been stolen by a mortal man as she danced on the beach. Without her skin she could not return to the sea, so she married the man. On the other side of the Atlantic, the American Indian tribe called Penobscot also claimed descent from a mermaid.


Mystical yet deadly or are they?
Mermaids are always believed to have beautiful singing voices. The Indians believed in the Apsaras, or "water-nymphs" who made up part of the god Indra's court and play the lute beautifully. Native American legend tells of a mermaid who would rise from the water and sing, calling people to her. Her song drove humans first to ecstasy, then to madness. When they could no longer resist it, they plunged into the water and drowned, just as with the sirens of ancient Greece! So we can conclude that mermaids have beautiful voices. Their irresistible lure we may dismiss as the hyperbole that gathers around all legends.
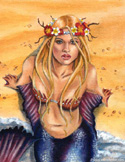
http://belladonna.com

Mermaids Exist


Sunday, November 12, 2006

Examples of Future Lesson Plans in Photography


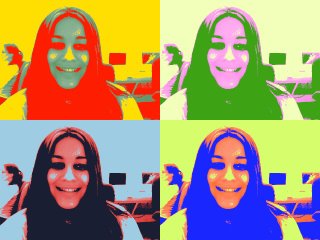
After taking the image you just cut and paste to make it four different images. You can either make it in photoshop or make it into a 2D painting. Excellent for teaching children the color wheels and prospective.

Monday, November 06, 2006

Images of student and their work

FALLING LEAVES


Special Needs Lesson Plan

Teacher: Yadira Toledo
Age: 3-5 years Grade Level: Early Intervention (Special Ed)
Title: Falling Fall Leaves
Brief History:
In the fall or autumn the leaves tend to turn colors. The rich dark green leaves turn to bright red, yellow and then brown. As it starts to get cold the wind blows the leaves. The leaved then fall on the ground creating a sea of leaves.


Goals: Students will be able to
1.Use their motor skills by cutting the leaves out.
2.Vocalize the colors they want to use for their leaves. (I want)
3.Repeat what is instructed and expected of them.
4.Recognize that leaves come from tree branches.
5.Choose what texture to apply to leaves

Teacher’s Prep Materials
Leaves
Scanner(copier)
Paint and brushes
Colored Cotton balls, glitter
Branches
Yarn or string
Glue
Scissors, markers

Teaching:
Teacher will begin the class by asking… What season are we in? Is it cold outside? What color are the leaves outside. Where do leaves come from?
Students will then talk about the different types of leaves.

Directions:
1. Teacher will pass out paper with three leaves on it.
2. Students are to color the leaves any color they want.
3. Students are then to cut out the shapes of the leaves.
4. The teacher will ask the students what texture they want. (Colored Cotton balls or
Glitter)
5. The students will then glue their texture on leaves.
6. Let leaves dry.
7. Teacher will punch a hole in the leaves and tie a piece of yarn.
8. Students will attach leaves to their branch.

Extensions: continue working on leaves
Closure: Children will put work in plastic zip lock bags
Time Budget: This assignment will take 1 week.

Directions for children:
1) Color Leaves (red, green, yellow, orange, brown)
2) Glue colored cotton balls or glitter on leaves
3) Let dry over night
4) Cut out leaves
5) Punch hole in the steam
6) Tie yarn to hole and tree branch

Abstraction of Reality Lesson Plan

Teacher: Yadira Toledo
Age: 16-17 Grade Level: 11th
Title: Abstraction of Reality
Brief History:
· Abstraction is the process of reducing the information content of a concept, typically in order to retain only information which is relevant for a particular purpose. For example, abstracting a leather soccer ball to a ball retains only the information on general ball attributes and behavior. Similarly, abstracting an emotional state to happiness reduces the amount of information conveyed about the emotional state.
· Abstract Expressionism is a type of art in which the artist expresses himself purely through the use of form and color. It non-representational, or non-objective, art, which means that there are no actual objects represented. example of an abstract painting.


On White 2, 1924, by Kandinsky


Goals: Students will be able to
1.Dissect from an image and produce a big piece from that
2.Take risk and deal with their decision.
3.Scan original image and use Photoshop.
4.Take something simple and make it complex
5. Produce crisp and detailed images


Teacher’s Prep Materials
*Slides show of painting
*Books on abstraction
*Teacher’s work
*Computer lab and Photoshop


Teaching:
Introduce the concept of using Abstraction in their photographs. Discuss the ways we can do this on the computer with Photoshop. Demonstrate how to cut a piece of chosen and image and building from just that square. Introduce new vocabulary words and go over the ways of changing filters.


Directions:
1. Scan in image that will be used for assignment
2. Using the crop tool pick the part of the image that will be used as abstraction.
3. Begin to experiment with shapes colors and filters.
4. When satisfy with image save as a jpeg to your hard drive
5. Print out finish piece.
6. Begin to write the steps taken to get the finish product in journal.
Extensions:
Produce another piece.

Closure:
Save everything on hard drive and in the class folder on computer. Put paper in portfolios.
Time Budget: 3o minutes a class for a week
Assessments: At the end of the class there will be a critique and everyone will project their image in the computer lab. All students will should original piece and transformed piece.


Bibliography:
http://en.wikipedia.org/wiki/Abstraction
http://www.artcyclopedia.com/history/abstract-expressionism.html
http://www.reviewpainting.com/Basil-Blackshaw.htm
http://www.pigment-digital.net/
http://www.photo.net/


Student reaction to assignment.

Students work: on Abstraction of Reality

Steps in completing Abstraction of Reality


Wednesday, November 01, 2006

WebQuest

In the Wild


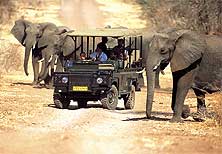
We are off to the wild in Africa!


There are four parts to this adventure. There will be students assigned in groups of four!


All groups are to decide who will be the photographer, the researcher, the magazine editor and the leader.

Jobs definitions:
1. The leader- is the person who guides everyone through the whole adventure. You are to pick what locations to go and what type of vehicle to drive in to fit all the equipment and your group. Must have a list of supplies you will need. Meaning you must ask all your coworkers what supplies they need to do their part and how much it will cost. Please make sure you have enough and it is a reasonable amount for everyone to share.
2. The photographer – is the person who takes pictures of all discovered items and traveled places. This is to keep a diary or documentation of where the group has pass and seen. In this assignment you will be collecting images from the web to place in the magazine. Make sure the images go with what the research is about.
3. The researcher- is the person who actually collects the data that is found through the journey. You must write everything in your own words. Plagiarisms is bad and will cause you and your group a failing grade. Document all the landmarks, the names of the places and animals you find. Make sure you have a vocabulary list of words you think might help the audience understand your magazine better.
4. The magazine editor- is the person who takes all the images and data and puts it in a magazine layout. You are basically in charge of all the duties of magazine layout. Which means the font “text”, colors, and display of the information gathered by your group.


Websites to look at:
• www.go2africa.com
• www.uyaphi.com
• www.eyesonafrica.net
• www.africam.com
• www.rosswarner.com
• www.pbs.org
• www.buzzle.com
• www.thesafaricompany.com
• http://www.unl.edu/museum/research/anthropology/buroscoll/safari.html


Friday, October 27, 2006

eLecture


The decipherment of Egyptian hieroglyphs was made possible by discovery of the Rosetta Stone, found in 1799 by Napoleonic troops fighting in Egypt. Although the stone was first the possession of a French officer, the victorious British demanded (and utltimately got) it, and it currently resides in the British Museum.
The Rosetta Stone itself is written in three languages: At the top, with much of the writing broken off, is the text in Egyptian hieroglphic. In the center is the complete text written in the Egyptian demotic script. At the bottom is the text written in koine Greek, the Greek which evolved during the Hellenistic period (c. 323 BC - 31 BC) as the standard form of Greek spoken throughout the Greek diaspora (area of dispersion) along the Eastern Mediterranean.
Oldest Writing in Time

History:
Hieroglyphics script was believed to be the invention of a god named Troth. Therefore the name hieroglyphic means, “god’s word”. The word hieroglyphics comes from the Greek word hieros meaning “sacred” plus glypho “inscriptions”.
It is said that Hieroglypics were invented about 5,000 years ago at around 3,300 B.C. The Ancient Egyptians alphabet consists of 24 consonants. They used this way of writing manly on tombs and walls which told a story of the pharaoh or daily life in Egypt.
Hieroglyphics are written in rows or columns and can be read from left to right. A hint to reading it is the human or animal figure will always face the direction in which the reader is to start.


Important Terms: Hieroglyphic signs divided in four categories.
1. Alphabetic signs: represent a single word.
2. Syllabic signs: represents combination of two or three consonants.
3. Word: signs are pictures of objects.
4. Determinative is a picture of an object which helps the reader.

Go to Bottom site to look at the Virtual alphabet!

http://www.uponreflection.co.uk/heiro/glyphs.htm

Write a story using Hieroglyphics
Cut and paste the hieroglyphics into your story.

Websites to look at for any help.
· http://www.eyelid.co.uk/pics/k.gif
· www.partner.galileo.org
· www.lakelandschools.org
· http://images.uk.ask.com/
· http://www.dragonstrike.com/
· http://www.touregypt.net/
· www.dia.org

www.greatscott.com

www.uponrequest.com


  • Monday, October 02, 2006

    My Images


    © 2005. Yadira Toledo. All rights reserved.

    Saturday, September 30, 2006

    Paper Plate Garden Lesson Plan

    Susan Rodriguez U/Arts

    Name: Yadira Toledo
    Age/Grade Level: Kindergarten/ 5-6 years old
    Title: Festive Flower: Paper Plate Garden
    Brief History/ Background

    Goal: To produce a Flower bouquet that is to be hung on the wall.

    Objectives/Benchmarks:
    Students will be aware of colors and how they can put them together.
    Students will learn to manipulate a paper plate in order to construct and assemble a flower.
    Students will learn how to apply color to fragments of paper which have been crumbled up.
    Students will learn how to mount the flowers on another paper surface.
    Students will create a flower bouquet.

    Materials/Supplies
    Markers
    Paper plates
    Staples
    Tape
    Paper tissues

    Teacher Preparation:
    Assemble all the supplies on the art table for the children.

    Introduction to Lesson (Discussion/Motivation):
    We all know that fall is a time when flowers and trees bloom into different beautiful colors. Today we are going to make our very own flowers. You can use as many different colors that you want. We are going to observe the shapes that flowers and leaves display in the fall. We will see the shapes in their details, and fragments. We will use paper plates and crumble and distort them, to make a whole flower that shows its different views.

    II. Directions:
    Retrieve materials from art station.
    Crumble, tear, or crush on the paper plate.
    Choose the colors you want to put on the plate
    After you finish coloring the plate(s) begin to fold it and manipulate it to make a flower.
    The teacher will help with the folding and stapling.
    Put the flower(s) aside and begin to color the last plate where you will tape on your flower(s).
    When completed, proceed to stuff the sides of the flowers with color tissues paper.
    Flowers will be mounted on the wall to welcome Fall.
    Please make sure your name is on the back of your masterpiece.
    Time Allotment Planner: 10 minute Introduction, 30 minute working time and 5 minute clean up time.